EC2 Stopped Instance
Overview
This tutorial demonstrates how to safely terminate an EC2 instance that has been stopped for more than 7 days to eliminate ongoing EBS volume charges and maximize cost savings.
Policy: ec2-stopped-7days Remediation Action: Terminate instance Target Service: EC2
Cost Impact
Immediate Savings:
- Eliminates 100% of EBS volume charges for attached storage
- For a typical stopped instance with 8GB root volume: ~$0.80/month or ~$9.60/year
Prerequisites
- Access to AWS Console with EC2 permissions
- Instance ID of the stopped instance to terminate
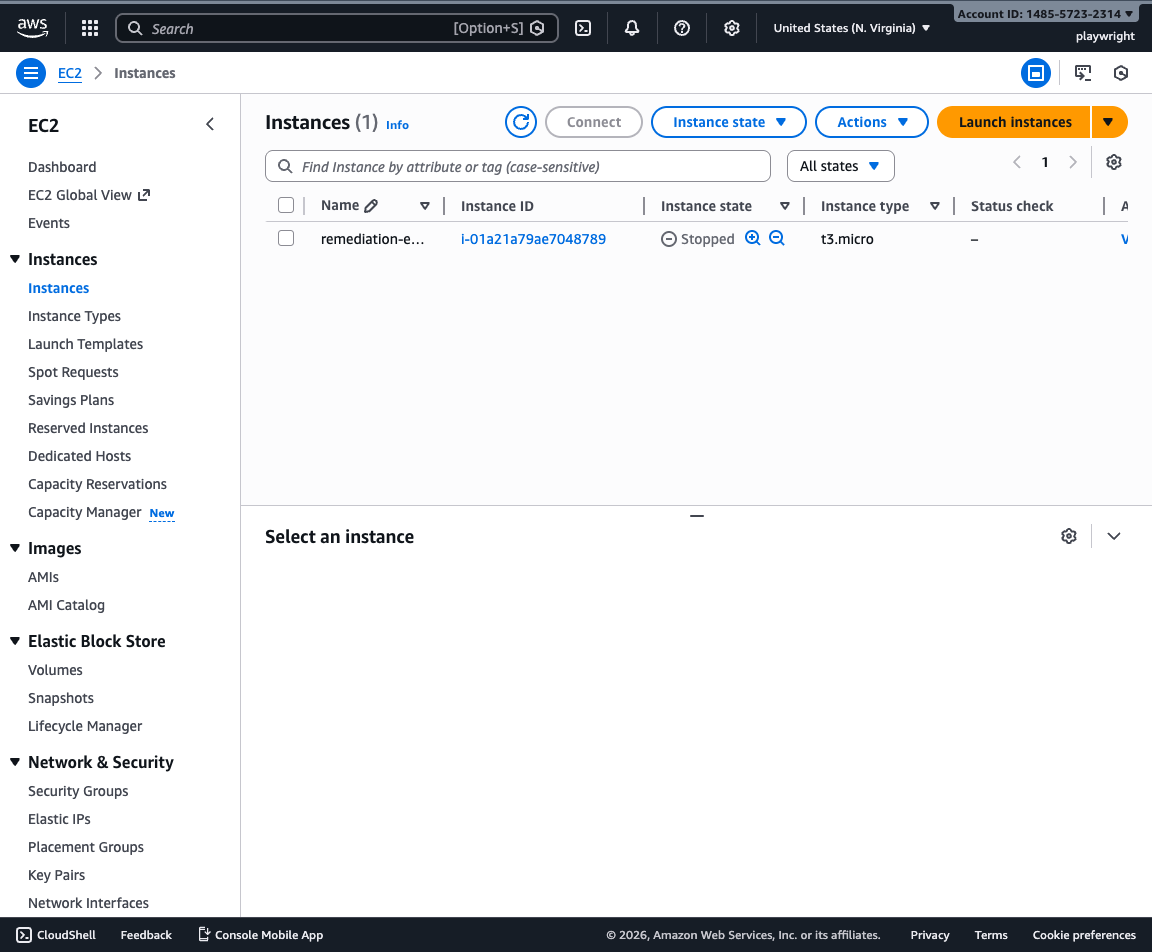
Step 1: Locate the Stopped Instance
Navigate to the EC2 Instances console at https://us-east-1.console.aws.amazon.com/ec2/home?region=us-east-1#Instances:
The stopped instance should appear with a state of "Stopped" and an orange indicator.
Step 2: Review Attached Volumes
Select the instance by clicking the checkbox next to it, then click the Storage tab in the instance details panel below.
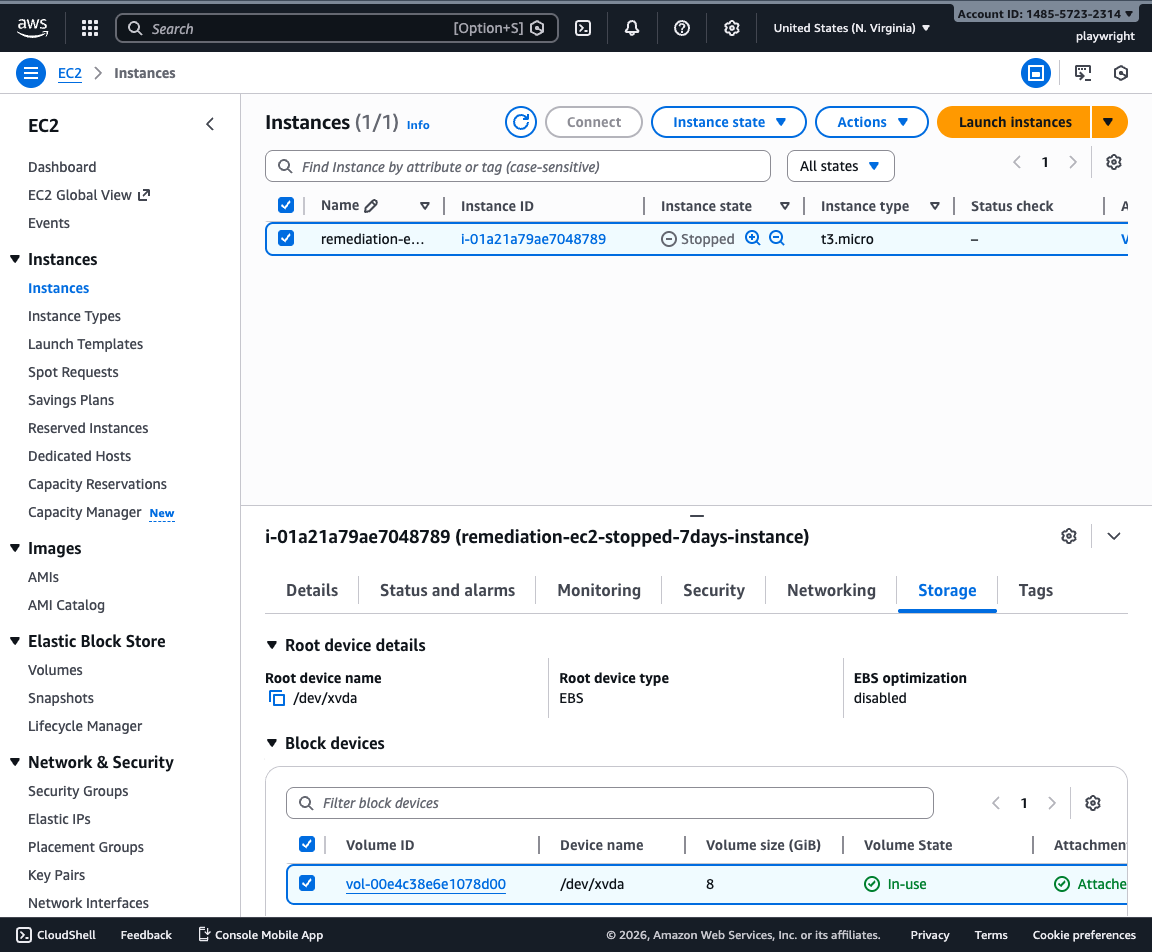
Note the volume IDs and sizes shown in the "Block devices" section - these volumes continue to incur charges while the instance is stopped. In this example, we see an 8 GiB volume attached at /dev/xvda.
Step 3: Optional - Create Snapshots
If you may need this data later, you can create snapshots before terminating:
- Navigate to EC2 > Elastic Block Store > Volumes
- Select the volume(s) attached to the instance
- Click Actions → Create snapshot
- Add a description like:
Backup of stopped instance i-01a21a79ae7048789 before termination - Created 2026-01-13

Note: Snapshots cost $0.05/GB-month compared to $0.08-0.125/GB-month for volumes, providing 37-60% savings while maintaining data recovery options.
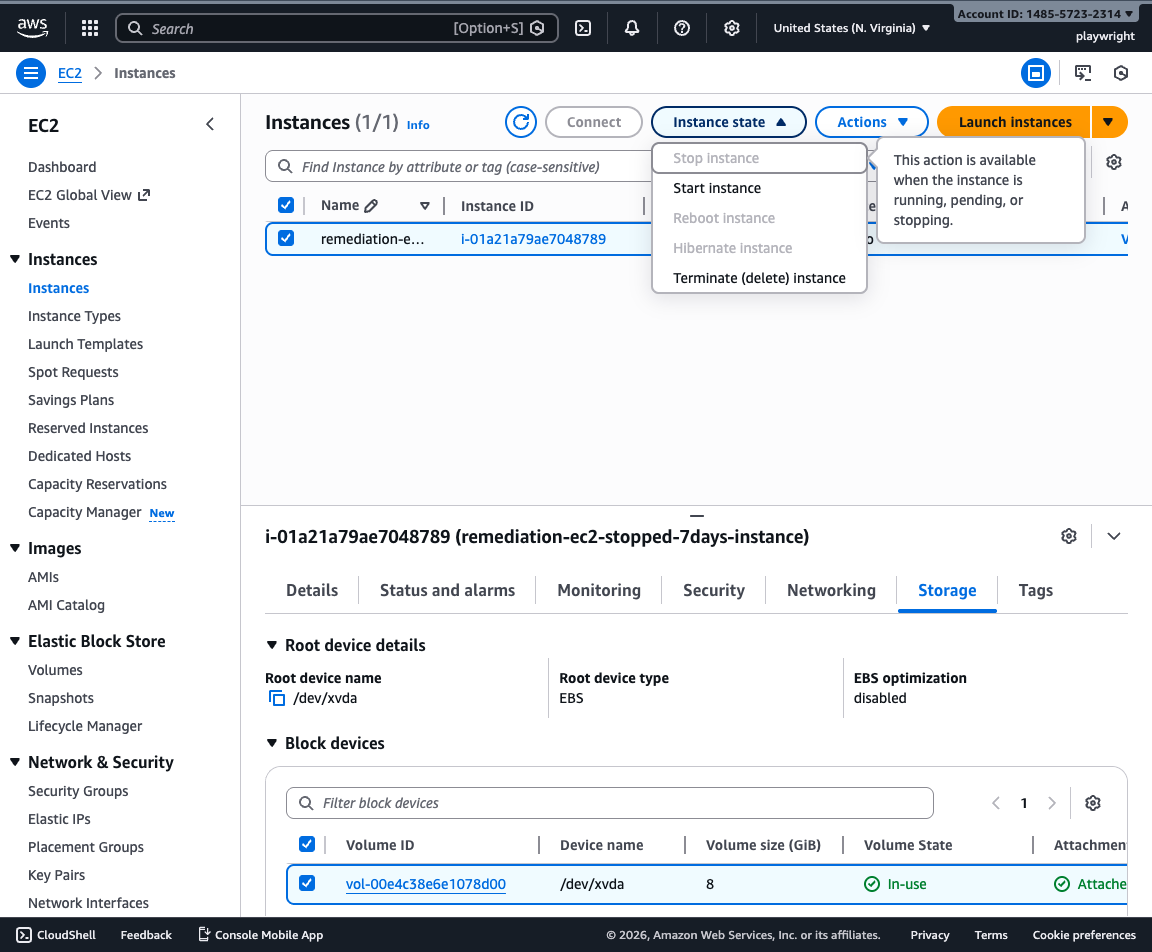
Step 4: Terminate the Instance
Return to the EC2 Instances console and ensure your stopped instance is selected.
Click Instance state → Terminate instance.
Step 5: Confirm Termination
Review the termination warning dialog. This action cannot be undone.
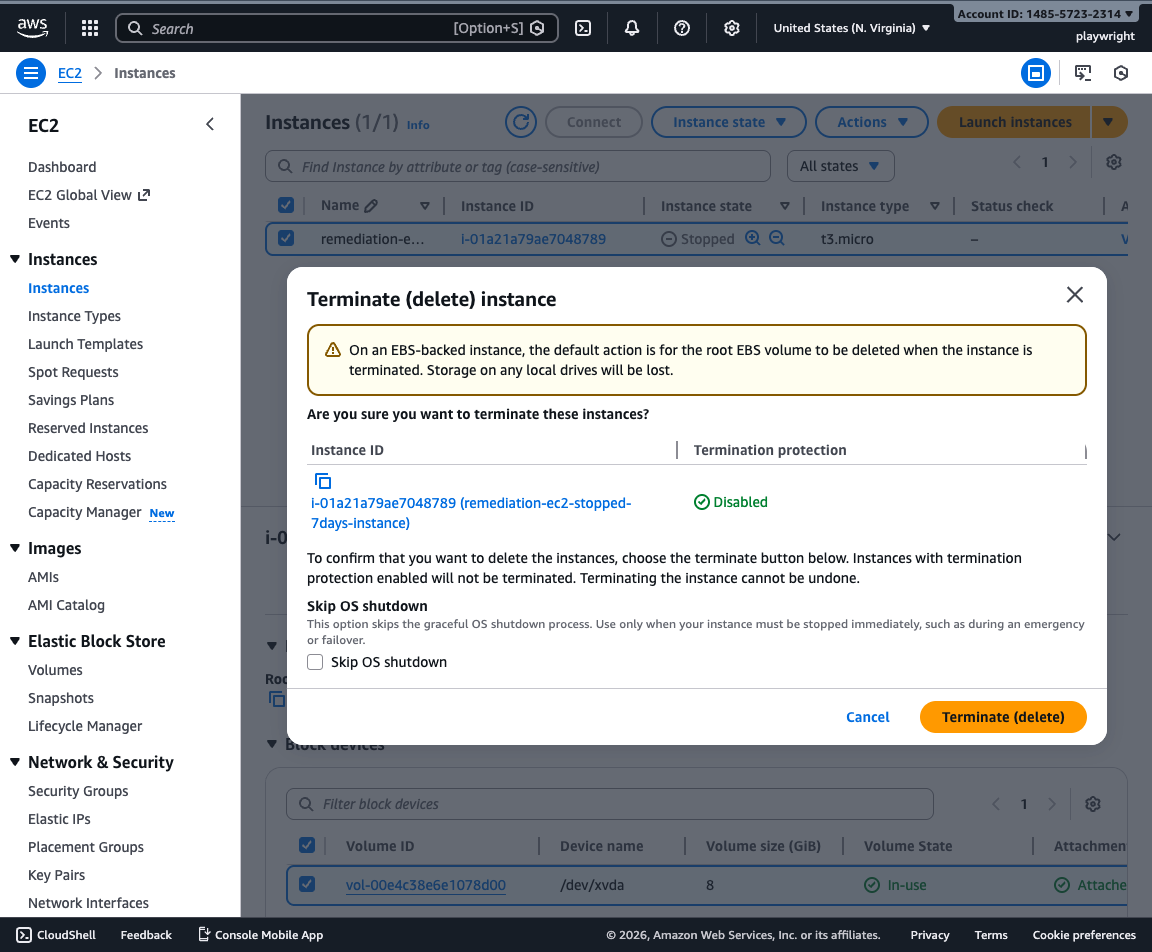
Important: The attached EBS volumes will be automatically deleted (as indicated by "Delete on termination: Yes" in the storage tab).
Click Terminate to complete the remediation.
Step 6: Verify Completion
The instance state will change to "Shutting down" and then "Terminated". The instance and its attached volumes will no longer incur charges.
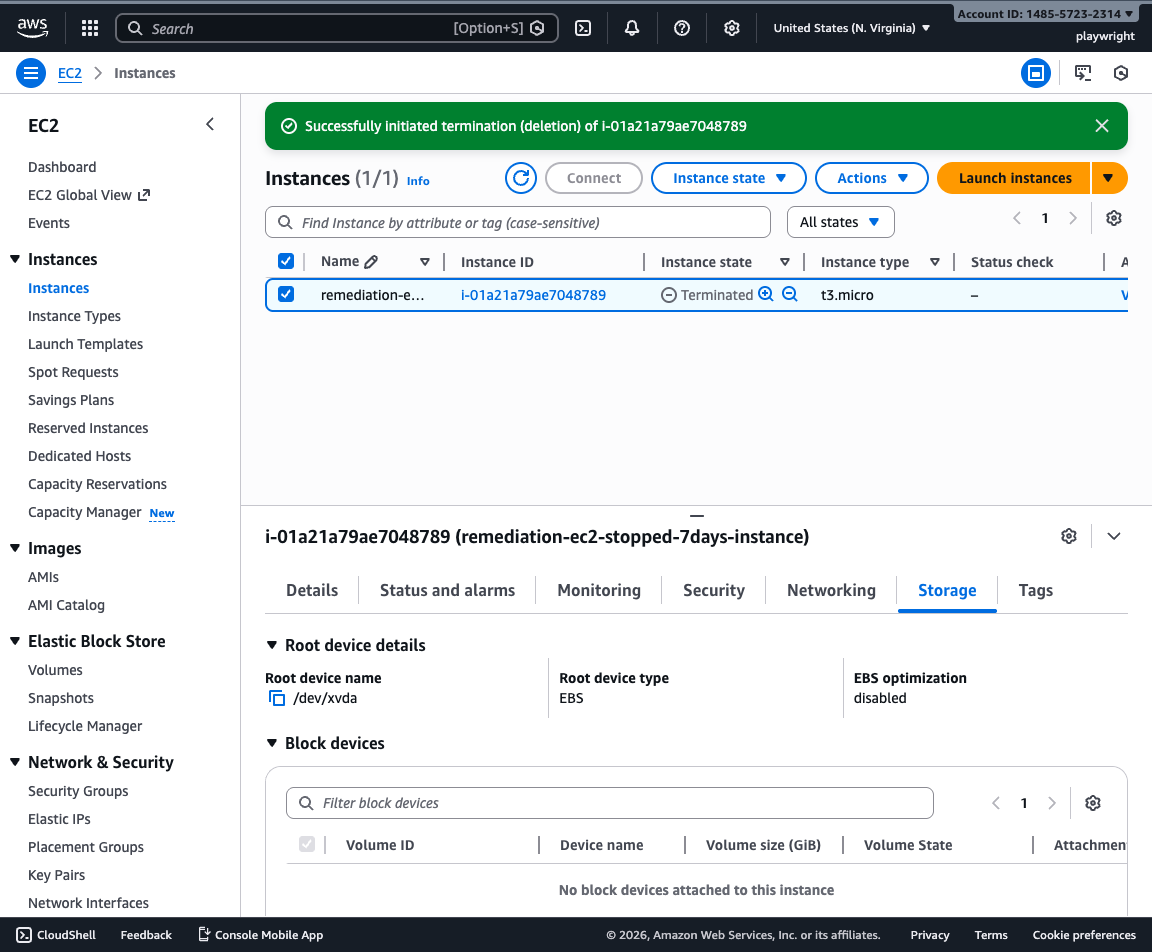
Notice in the Storage tab that it now shows "No block devices attached to this instance" - the volumes have been deleted along with the instance.
Cost Savings Achieved: All EBS volume charges have been eliminated!
Alternative Approaches
1. Terminate Without Snapshots
If the data is not needed, skip the snapshot creation steps and terminate immediately for 100% cost elimination with no ongoing snapshot charges.
2. Create AMI Instead
Use Actions → Image and templates → Create image to capture the entire instance configuration. This allows you to launch identical instances later and includes automatic snapshots of all attached volumes.
3. Automated Cleanup
Implement automated policies or AWS Config rules to automatically terminate instances stopped for >7 days, preventing future waste.
4. Instance Scheduler
For dev/test instances that are intentionally stopped, use AWS Instance Scheduler to automatically start/stop on a schedule rather than leaving stopped indefinitely.
Summary
By terminating stopped EC2 instances that are no longer needed, you:
- Eliminate 100% of EBS volume costs
- Simplify resource management
- Reduce clutter in your EC2 console
- Maintain compliance with cost optimization policies
For instances with valuable data, creating snapshots before termination provides a cost-effective backup option at 37-60% lower cost than keeping volumes attached to stopped instances.