RDS gp2 to gp3 Storage Migration
Overview
This tutorial demonstrates how to migrate an Amazon RDS instance from gp2 to gp3 storage to achieve 20% cost savings while improving performance. The migration is free, non-disruptive, and can be completed in minutes through the AWS Console.
Prerequisites
- An AWS account with access to the RDS console
- An existing RDS instance using gp2 storage
- Appropriate IAM permissions to modify RDS instances
Cost Impact
Migrating from gp2 to gp3 provides:
- 20% cost savings: gp2 costs $0.115/GB-month vs gp3 at $0.092/GB-month
- Better baseline performance: gp3 provides consistent 3,000 IOPS vs gp2's burstable IOPS
- Example savings:
- 100 GB database: $2.30/month ($27.60/year)
- 500 GB database: $11.50/month ($138/year)
- 1 TB database: $23/month ($276/year)
Step 1: Navigate to RDS Console
Navigate to the RDS console in the us-east-1 region: https://us-east-1.console.aws.amazon.com/rds/home?region=us-east-1#databases:

Step 2: Locate and Select Your RDS Instance
Click on the database instance you want to migrate (in this example, remediation-rds-gp2-to-gp3-db) to view its details.
Step 3: Verify Current Storage Type
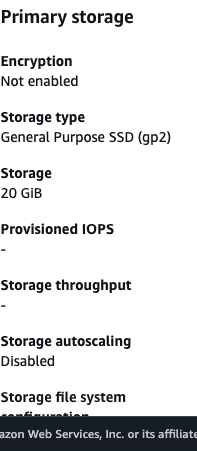
Navigate to the Configuration tab to view the current storage settings. In the Primary storage section, you'll see:
- Storage type: General Purpose SSD (gp2)
- Storage cost: $0.115/GB-month
Step 4: Initiate Storage Modification
Click the Modify button in the top right corner to begin changing the storage configuration.
Step 5: Change Storage Type to gp3
Scroll to the Storage section and click on the Storage type dropdown. Select General Purpose SSD (gp3).
![]()
This change will:
- Reduce storage costs by 20% (from $0.115 to $0.092 per GB-month)
- Provide better baseline performance (3,000 IOPS consistently vs gp2's burstable IOPS)
Step 6: Review gp3 Storage Settings
After selecting gp3, you'll see the default gp3 settings:
- Provisioned IOPS: 3,000 IOPS (baseline included at no extra cost)
- Storage throughput: 125 MiBps (baseline included at no extra cost)
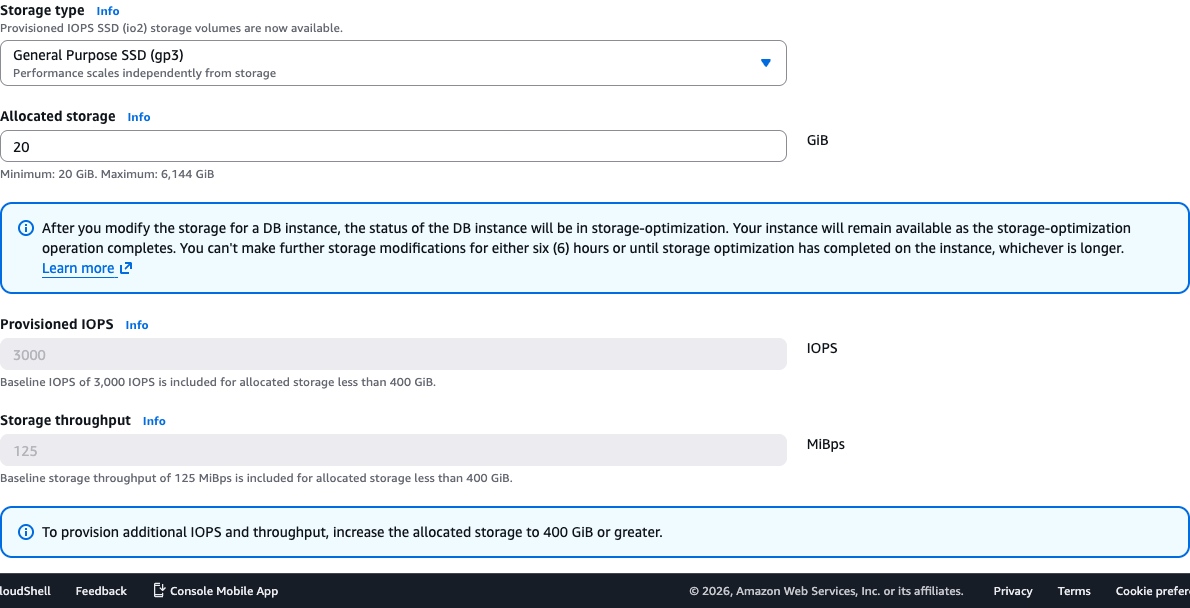
For most workloads, the baseline performance is sufficient. You can increase IOPS or throughput if needed by allocating more than 400 GiB of storage.
Step 7: Continue to Summary
Scroll to the bottom of the page and click Continue to proceed to the summary page.
Step 8: Apply Immediately
On the summary page, you'll see a table showing the storage type change from gp2 to gp3.
Select Apply immediately to perform the storage modification now. This will:
- Apply the change as soon as possible (typically within minutes)
- Cause a brief I/O pause (typically under 1 minute) during conversion
- Keep the database available during the process
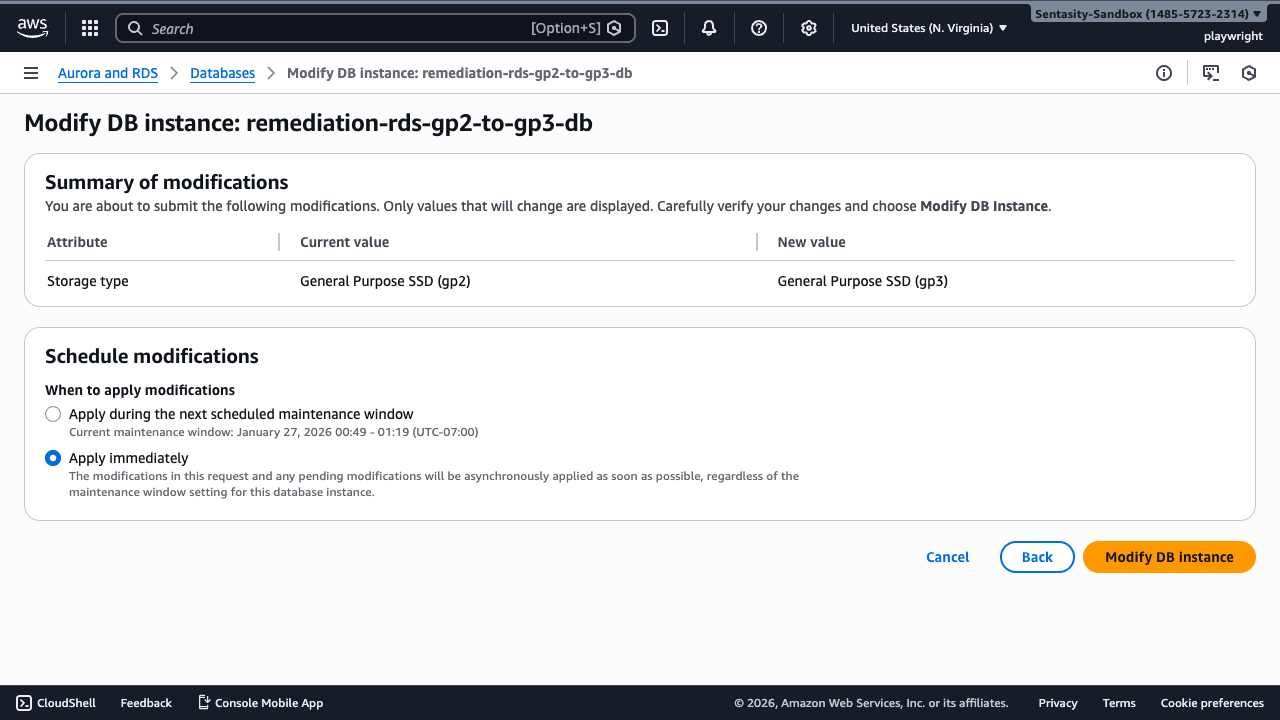
Alternatively, you can select "Apply during the next maintenance window" to schedule the change.
Step 9: Confirm Modification
Review the summary showing:
- Attribute: Storage type
- Current value: General Purpose SSD (gp2)
- New value: General Purpose SSD (gp3)
Click Modify DB instance to confirm and initiate the modification.

Step 10: Monitor Modification Progress
After confirming, you'll be returned to the Databases list. A notification banner will appear indicating that the modification is in progress:
"Modifying remediation-rds-gp2-to-gp3-db. This process might take a few minutes."
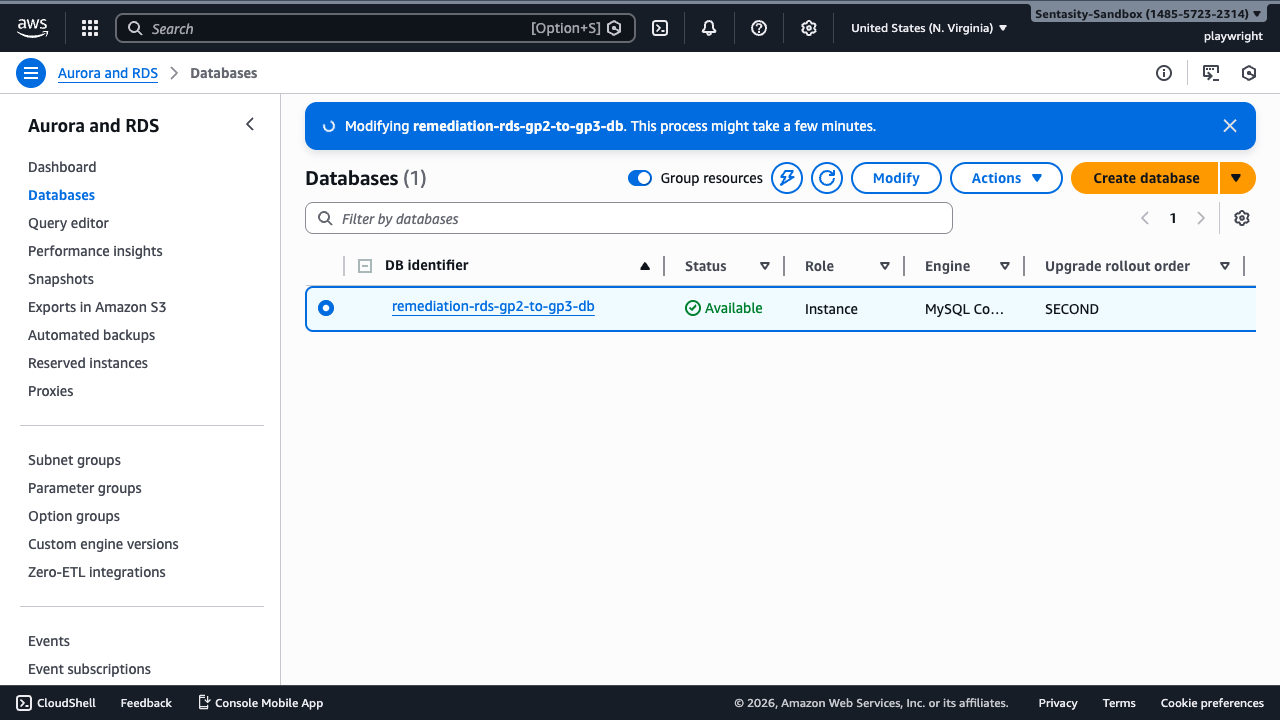
The database status will change to Modifying. The storage conversion happens in the background and typically completes within minutes. Your database remains available during this process, though there may be a brief I/O pause.
Step 11: Verify Successful Migration
Once the status returns to Available, navigate back to the database details and click on the Configuration tab. In the Primary storage section, verify:
- Storage type: General Purpose SSD (gp3)
- Provisioned IOPS: 3,000 IOPS (or your configured value)
- Storage throughput: 125 MiBps (or your configured value)
Your RDS instance is now using gp3 storage with 20% lower costs and better baseline performance.
Alternative Approaches
AWS CLI
For automated or scripted migrations, use the AWS CLI:
aws rds modify-db-instance \
  --db-instance-identifier your-db-instance-name \
  --storage-type gp3 \
  --apply-immediately \
  --region us-east-1
Infrastructure as Code
CloudFormation:
Resources:
  MyDatabase:
    Type: AWS::RDS::DBInstance
    Properties:
      StorageType: gp3
      # ... other properties
Terraform:
resource "aws_db_instance" "default" {
  storage_type = "gp3"
  # ... other properties
}
Bulk Migration
For migrating multiple RDS instances, create a script:
#!/bin/bash
# Get all gp2 instances
aws rds describe-db-instances --query 'DBInstances[?StorageType==`gp2`].DBInstanceIdentifier' --output text | \
while read instance; do
  echo "Migrating $instance to gp3..."
  aws rds modify-db-instance \
    --db-instance-identifier "$instance" \
    --storage-type gp3 \
    --apply-immediately
done
Summary
Migrating from gp2 to gp3 storage is a straightforward process that provides immediate cost savings and performance improvements. The migration is:
- Free: No migration fees
- Non-disruptive: Database remains available
- Quick: Typically completes in minutes
- Reversible: Can be changed back if needed
For a 100 GB database, you'll save $2.30/month ($27.60/year), and the savings scale proportionally with larger databases.