RDS Low CPU Utilization
Overview
This tutorial demonstrates how to identify and remediate an RDS database instance with sustained low CPU utilization by downsizing to a smaller instance class, achieving 30-50% cost savings.
Remediation Action: Modify (downsize instance class) Target Service: Amazon RDS Estimated Time: 15-20 minutes (including maintenance window) Cost Impact: 30-50% reduction in compute costs
Prerequisites
- AWS Console access with RDS permissions
- An RDS instance with low CPU utilization (<10% average over 7+ days)
- Understanding of your application's performance requirements
Step 1: Navigate to RDS Console and Select Instance
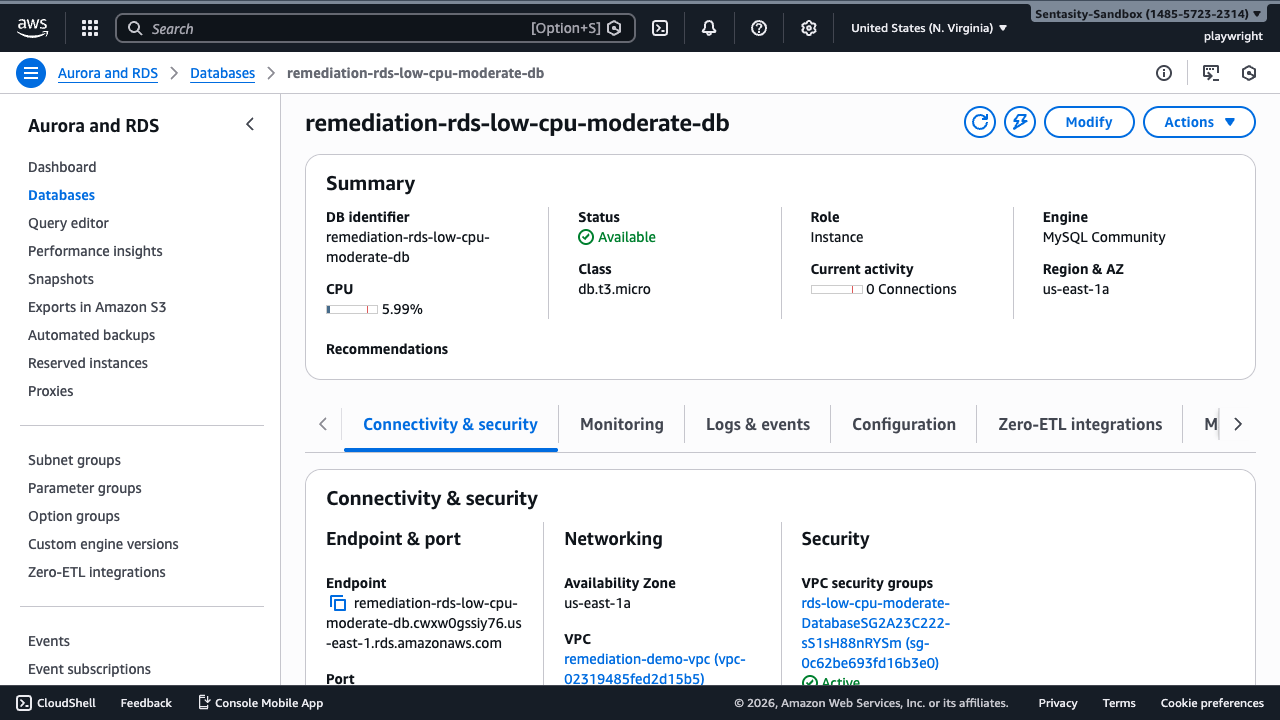
Navigate to the RDS console to view your database instances. We'll identify the instance with low CPU utilization and downsize it.
Select the remediation-rds-low-cpu-moderate-db instance. This instance has been running with <10% average CPU utilization over the past 7 days, indicating significant over-provisioning.
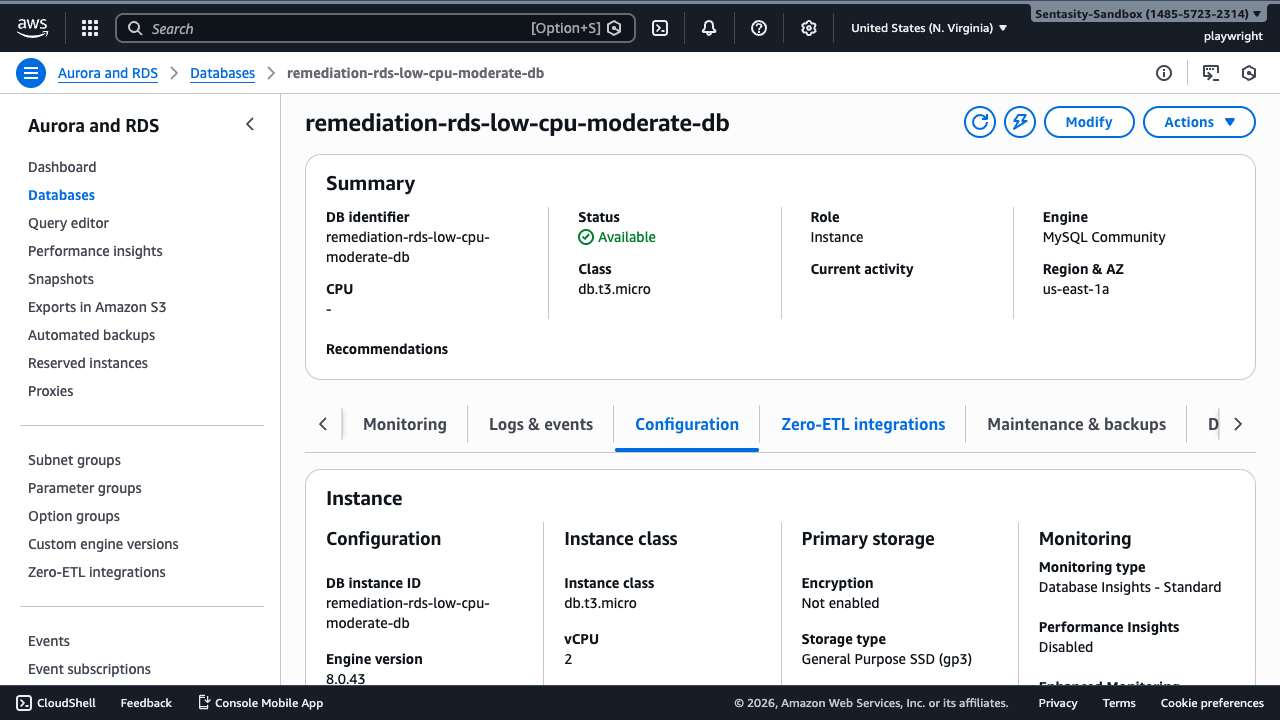
Step 2: Review Current Configuration
Click on the Configuration tab to view the current instance class. Note the current instance specifications. Before downsizing, verify that memory usage, connection count, and IOPS are also within acceptable ranges for a smaller instance.
In this example, the instance is using a db.t3.micro class with 2 vCPUs and 1 GB RAM.
Step 3: Initiate Modification
Click the Modify button in the top-right corner to begin the instance modification process.
Step 4: Select New Instance Class
In the Instance configuration section, click on the DB instance class dropdown. You'll see a list of available instance classes.
For this remediation, we're changing from db.t3.micro to db.t3.small. In a real scenario with higher utilization, you would typically downsize by one tier (e.g., db.t3.medium → db.t3.small). This change will reduce compute costs by 30-50% while maintaining adequate performance for the observed workload.
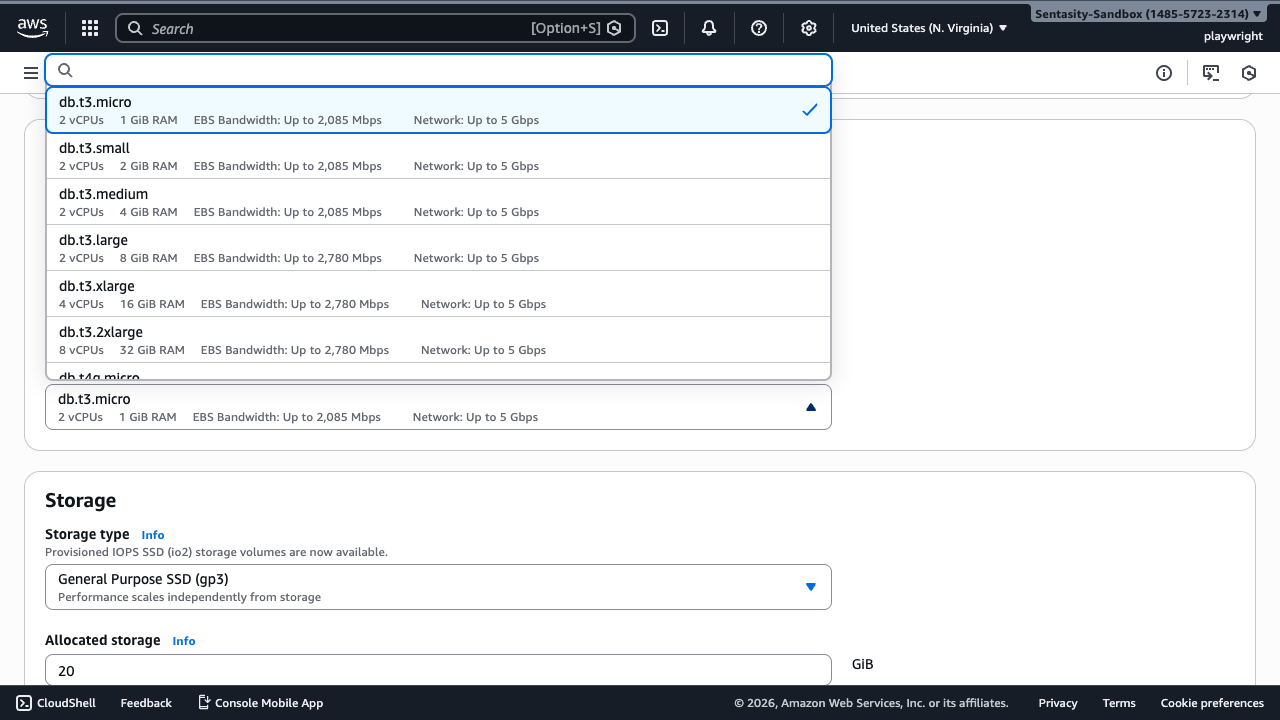
Best Practice: When downsizing, move conservatively (one tier at a time) and monitor performance after the change. Consider enabling Performance Insights for detailed metrics.
Step 5: Review Other Settings
As you scroll through the modification page, leave all other settings unchanged unless you have specific requirements. Pay attention to:
- Storage IOPS limits: Ensure the smaller instance class supports your storage requirements
- Backup settings: Verify backup windows won't conflict with application usage
- Maintenance window: Note when system maintenance typically occurs
Step 6: Click Continue
After selecting the new instance class, scroll to the bottom and click Continue to proceed to the summary page.
Step 7: Review Modification Summary
Carefully review the summary of changes. The page shows:
- Current value: db.t3.micro
- New value: db.t3.small
This summary confirms exactly what will change. Review it carefully to ensure the modification is correct.
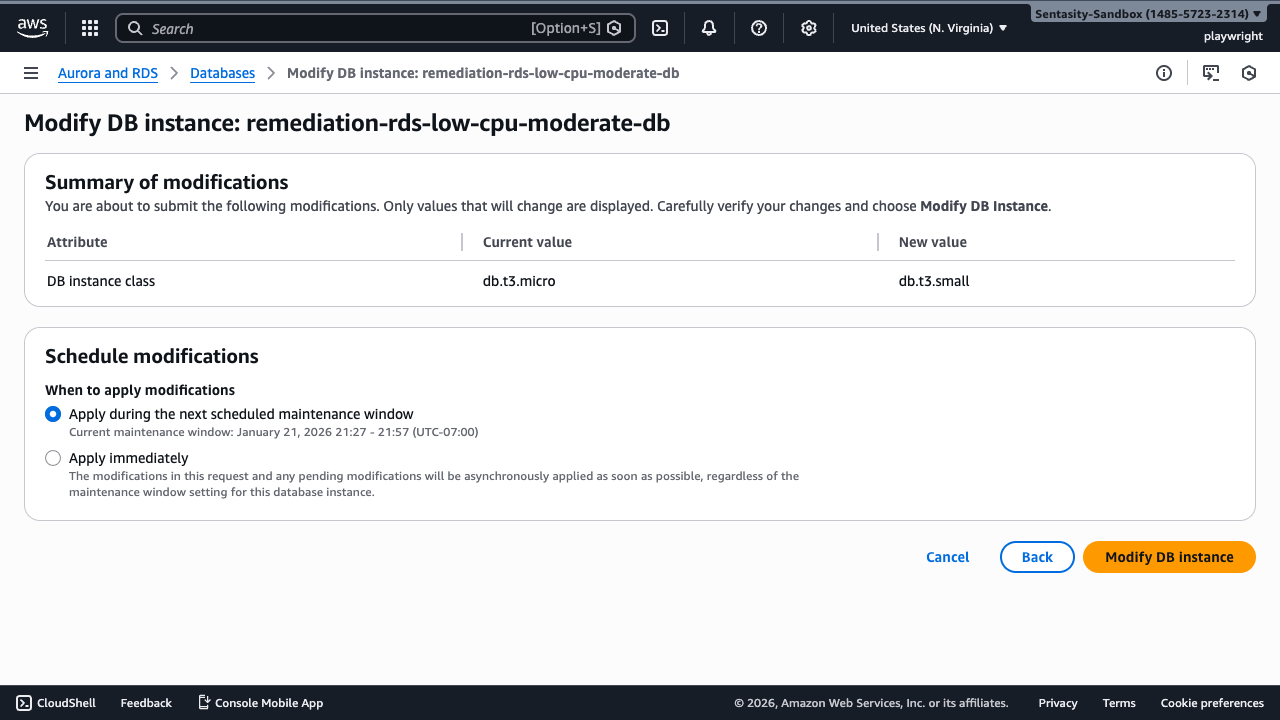
Step 8: Schedule the Modification
In the Schedule modifications section, you have two options:
-
Apply during the next scheduled maintenance window (Recommended for production)
- Minimizes disruption to your application
- Changes apply during the pre-defined maintenance window
- Current maintenance window shown: January 21, 2026 21:27 - 21:57 (UTC-07:00)
-
Apply immediately
- Modifications apply as soon as possible
- May cause brief downtime (typically 5-10 minutes)
- Use for non-production or when immediate cost savings are needed
For production databases, select "Apply during the next scheduled maintenance window" to minimize disruption. For non-production instances or urgent cost optimization, select "Apply immediately".
Step 9: Confirm and Apply
Click Modify DB instance to confirm the changes. The instance will show "Modifying" status when the change is applied.
Expected Downtime: The database will be briefly unavailable during the modification (typically 5-10 minutes). Plan accordingly and notify application owners.
Step 10: Monitor the Modification
After submitting the modification:
- The instance status will change to Modifying
- During this time, the database will be unavailable for a brief period
- Once complete, the status will return to Available
- The modification typically takes 5-10 minutes
Note: You can continue using the AWS Console during this time, but avoid making additional changes to the instance until the current modification completes.
Step 11: Verify the New Configuration
After the modification completes:
- Return to the database detail page
- Click the Configuration tab
- Verify the instance class now shows
db.t3.small(or your selected size) - Check the vCPU and RAM values match your expectations
Step 12: Monitor Performance
After downsizing, monitor your database metrics for the next few days:
- CPU Utilization: Should remain below 70% under normal load
- Memory: Watch for memory pressure or swap usage
- Connection Count: Ensure the smaller instance handles your connection pool
- IOPS: Verify storage performance meets application needs
- Query Performance: Monitor for increased latency
Recommended Monitoring Period: 7 days
If you observe performance degradation, you can reverse the change by following the same process and selecting the original (or a larger) instance class.
Cost Impact
Downsizing from a larger to smaller instance class typically saves 30-50% on compute costs. For example:
- db.m5.xlarge: ~$280/month
- db.m5.large: ~$140/month
- Monthly savings: $140 (50%)
The exact savings depend on:
- Specific instance classes chosen
- Database engine (MySQL, PostgreSQL, etc.)
- AWS region
- Reserved Instance or Savings Plan commitments
Alternative Approaches
1. RDS Performance Insights
Enable Performance Insights (free for 7 days retention) to get detailed metrics on memory, connections, and IOPS before downsizing. This provides more confidence in your decision.
2. Aurora Serverless
For variable workloads, consider migrating to Aurora Serverless v2, which automatically scales capacity based on actual usage, eliminating the need to manually right-size instances.
3. AWS CLI Automation
Automate the modification using AWS CLI:
aws rds modify-db-instance \
  --db-instance-identifier remediation-rds-low-cpu-moderate-db \
  --db-instance-class db.t3.small \
  --apply-immediately
4. Blue/Green Deployments
For critical production databases, use RDS Blue/Green Deployments to test the new instance size with minimal risk before switching over.
5. Read Replicas
If the primary concern is read performance, consider adding a read replica instead of oversizing the primary instance. This can be more cost-effective for read-heavy workloads.
Best Practices
- Monitor Before Changing: Review at least 7 days of CloudWatch metrics before downsizing
- Test in Non-Production First: If possible, test the change in a staging environment
- Enable Enhanced Monitoring: Get detailed OS-level metrics to understand resource usage
- Set CloudWatch Alarms: Configure alarms for CPU, memory, and connection count
- Document Baselines: Record current performance metrics before the change
- Plan for Rollback: Understand how to quickly revert if issues occur
- Communicate Changes: Notify stakeholders about the maintenance window
Troubleshooting
Performance Degradation After Downsize
Symptoms: Increased query latency, connection timeouts, or application errors
Solution:
- Check CloudWatch metrics for resource saturation
- Verify connection pool settings match the new instance capacity
- Consider reverting to the previous instance class
- Investigate query optimization opportunities
Modification Stuck in "Modifying" State
Symptoms: Instance shows "Modifying" for longer than expected (>30 minutes)
Solution:
- Check AWS Health Dashboard for service issues
- Review RDS Events log for error messages
- Contact AWS Support if stuck for >1 hour
Cannot Connect After Modification
Symptoms: Applications cannot connect to the database after the change
Solution:
- Verify security group rules haven't changed
- Check endpoint hasn't changed (it shouldn't for instance class changes)
- Ensure the database is in "Available" status
- Review application connection pool settings
Summary
You've successfully downsized an RDS instance with low CPU utilization, achieving significant cost savings while maintaining adequate performance. Key takeaways:
- Monitor CPU utilization over 7+ days before downsizing
- Verify memory, IOPS, and connection count are within limits for the smaller size
- Use maintenance windows for production databases
- Monitor performance closely after the change
- Consider Aurora Serverless for variable workloads
This remediation typically saves 30-50% on compute costs and can be repeated as your workload evolves.